
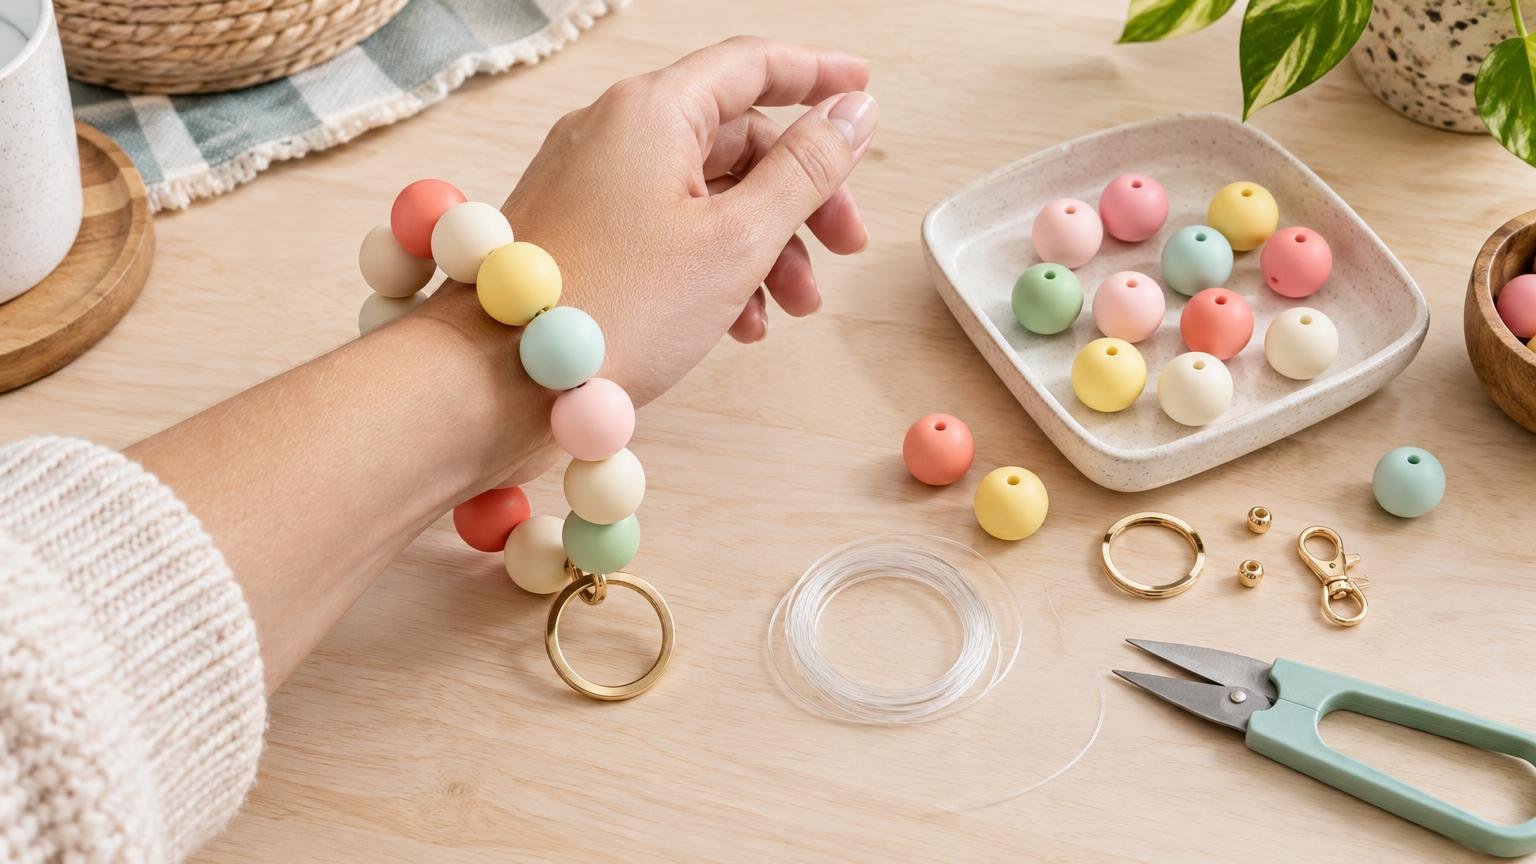
How Many Beads Do You Need to Make a Wristlet?
For a beaded key wristlet made with 15 mm silicone beads, start with about 14 beads. String them, assemble the loop temporarily and check whether it passes comfortably over the intended user’s hand before tying the final knot. A published project uses 14 round 15 mm silicone beads plus one 14 mm wooden accent bead, which makes that a practical starting layout rather than a universal rule.
The fuller answer to how many beads do you need to make a wristlet depends on what “wristlet” means. A key wristlet needs enough clearance to slide over the hand, while a stretch bracelet is usually sized closer to the wrist. Bead diameter, focal pieces, letter beads, spacers and the way the cord attaches to the hardware can all change the final count.
Start with the type of wristlet
Most silicone-bead wristlet projects are key accessories: a loop of beads connected to a key ring, clasp or similar hardware. Their useful fit is determined by the hand, not only the wrist. If the loop matches the wrist measurement exactly, it may look neat on the table but be too small to pull over the hand.
A stretch bracelet is different. Fire Mountain Gems gives approximate finished lengths of 6.5 inches for a small wrist, 7 inches for a medium wrist and 7.5 to 8 inches for a large wrist. Those are starting points for bracelets, not guaranteed key-wristlet sizes.
- For a 15 mm silicone-bead key wristlet, lay out about 14 beads first.
- For a similar layout made entirely with 12 mm beads, begin with roughly 18 or 19 beads.
- For a stretch bracelet, measure the wrist and use the intended finished bracelet length rather than the 14-bead shortcut.
- For either project, keep two or three spare beads nearby so you can adjust the fit without interrupting the build.
These counts assume the beads sit close together. Large spacers, wide letter beads or a focal bead can replace some of the rounds. A tassel or charm hanging from the hardware generally does not replace a bead unless it occupies space directly along the strung loop.
Calculate the bead count from bead width
For round beads with little or no space between them, use this starting formula: target strung length in millimeters ÷ bead width in millimeters = approximate number of beads. One inch equals 25.4 millimeters.
For example, a 7-inch bracelet has a target length of 177.8 mm. Divide 177.8 by 12 mm and the result is about 14.8, so you would begin with 15 beads. This is a planning count, not a reason to finish the bracelet without trying the layout around the wrist first.
| Target length | 8 mm beads | 10 mm beads | 12 mm beads | 15 mm beads |
|---|---|---|---|---|
| 7 inches | About 22 | About 18 | About 15 | About 12 |
| 7.5 inches | About 24 | About 19 | About 16 | About 13 |
| 8 inches | About 25 | About 20 | About 17 | About 14 |
The table is most useful for plain, evenly sized rounds. Treat each result as the first count to string. Rounding, bead-shape variation and the space consumed by the finishing arrangement can leave the real project one bead above or below the calculated total.
Large beads also create a chunkier loop than small beads. Two strands can have a similar measured length along their bead holes yet feel different around a wrist or hand. That is why a physical test fit matters more than making the arithmetic land on a perfect whole number.
How to count beads in a mixed pattern
For a pattern that combines sizes, add the widths of all components in one repeat. Then divide the target strung length by that repeat width.
Suppose one repeat contains a 15 mm round, a 12 mm letter bead and a 3 mm spacer. The repeat occupies approximately 30 mm along the cord. A target decorative length of 210 mm would take about seven repeats because 210 ÷ 30 = 7. That produces 21 total components: seven rounds, seven letter beads and seven spacers.
If the pattern does not repeat evenly, count by total width instead. Write down each component and add its width along the cord—not necessarily its tallest or widest visible dimension. A focal bead may be 20 mm tall but only 12 mm wide from hole to hole, and that hole-to-hole direction is the measurement that affects the strung length.
- Count focal and letter beads when they sit directly in the loop.
- Count spacers by their actual width, even when they are only a few millimeters each.
- Do not subtract a dangling tassel or charm from the bead total unless its attachment occupies part of the strung section.
- Include repeated decorative knots only if they create measurable gaps between beads.
- Lay out the complete sequence before cutting so you can catch an uneven pattern or misspelled name.
A simple way to size a key wristlet
The cleanest method is to let the first layout act as a flexible sample. You are not committing to the calculated count until the beads, cord and hardware are together.
- Choose the intended hand clearance. If the wristlet is a gift, use a generous test opening rather than assuming the recipient has the same hand size as you.
- Lay out about 14 beads when using 15 mm rounds. If you are replacing them with 12 mm beads, start around 18 or 19.
- Add letter beads, focal beads and spacers in their final order. Remove enough rounds to compensate for their combined width.
- Confirm that the cord passes through every bead and through any hardware connection required by the design.
- String the complete layout and form a temporary loop without making the permanent finish.
- Pass the loop over the intended user’s hand. Include the hardware in the assembly because the attachment method can consume cord or affect how the loop closes.
- Add or remove one bead at a time until the wristlet clears the hand without creating an unnecessarily loose loop.
- Only then make the final finish appropriate to the chosen cord and hardware.
Avoid pulling elastic as tightly as possible during the test. Excess tension can make a loop appear smaller and can hide how the beads naturally sit. Hold the temporary closure securely, but let the strand settle into its intended shape before judging the fit.
How much extra cord should you cut?
The bead calculation estimates the finished strung section, not the total amount of cord to cut. Beadalon advises cutting elastic cord approximately 2 to 3 inches longer than the intended finished length so there is room for tying.
That means an 8-inch finished bracelet might begin with roughly 10 to 11 inches of elastic. A key wristlet may need a different allowance depending on how the cord passes through or around its hardware, so inspect the construction method before cutting. It is easier to trim a short tail after finishing than to tie securely with tails that are too short.
Check cord and bead compatibility before stringing the full sequence. The listed outer diameter of a bead does not tell you its hole size, and decorative beads in the same project may have different openings. Test the cord through the smallest hole, including any return pass required by the finishing method.
Plan the quantity you need to buy
For one basic 15 mm key wristlet, buying or setting aside 16 to 17 coordinating beads gives you a 14-bead starting layout plus a small adjustment margin. If the design includes a focal bead, letters or wide spacers, sketch the sequence first rather than buying 14 rounds automatically.
For multiple wristlets, calculate each design separately and then add a modest reserve. As a simple example, five wristlets at 14 beads each require 70 beads in their finished layouts. Setting aside a few additional matching beads protects the plan if a hole is unusable, the pattern changes or one recipient needs a larger opening. This reserve is a project-planning choice, not part of the finished count.
Keep small parts away from young children
Loose beads and small hardware can present a choking hazard. The U.S. Consumer Product Safety Commission explains that small-parts requirements apply to products intended for children under age three and uses a test cylinder to determine whether an item qualifies as a small part. Its small-parts and choking-hazard guidance provides the official regulatory overview.
Treat a beaded key wristlet as an adult key accessory. Do not describe it as a teether, toy or child-safe product without evidence that the complete product meets all requirements for that intended use. Keep loose beads, cut cord and hardware out of reach of young children while you work.
Use 14 beads as a starting point, not a finishing rule
If you are making the common silicone-bead key wristlet, begin with about 14 of the 15 mm beads. Switch to roughly 18 or 19 when using 12 mm beads for a comparable starting length, then account for every letter, spacer and focal component in the strung loop.
The final decision should come from a temporary test fit with the hardware included. If the loop does not clear the hand, add one bead. If it hangs more loosely than intended, remove one. That small fitting step is more reliable than any universal bead count—and it is what makes the finished wristlet look planned rather than merely assembled.